

Step-by-Step Guide to Effectively Use Your Rechargeable Water Flosser
Using a rechargeable water flosser is an excellent way to improve your oral hygiene routine. Whether you’re a newcomer or experienced user, understanding the correct techniques and best practices will maximize the effectiveness of this dental tool. In this step-by-step guide, we’ll walk you through the proper usage of a rechargeable water flosser and explain its benefits, so you can maintain healthier teeth and gums.
1. Prepare Your Water Flosser
Before using your rechargeable water flosser, it's important to make sure it's ready for use. Here’s what you need to do:
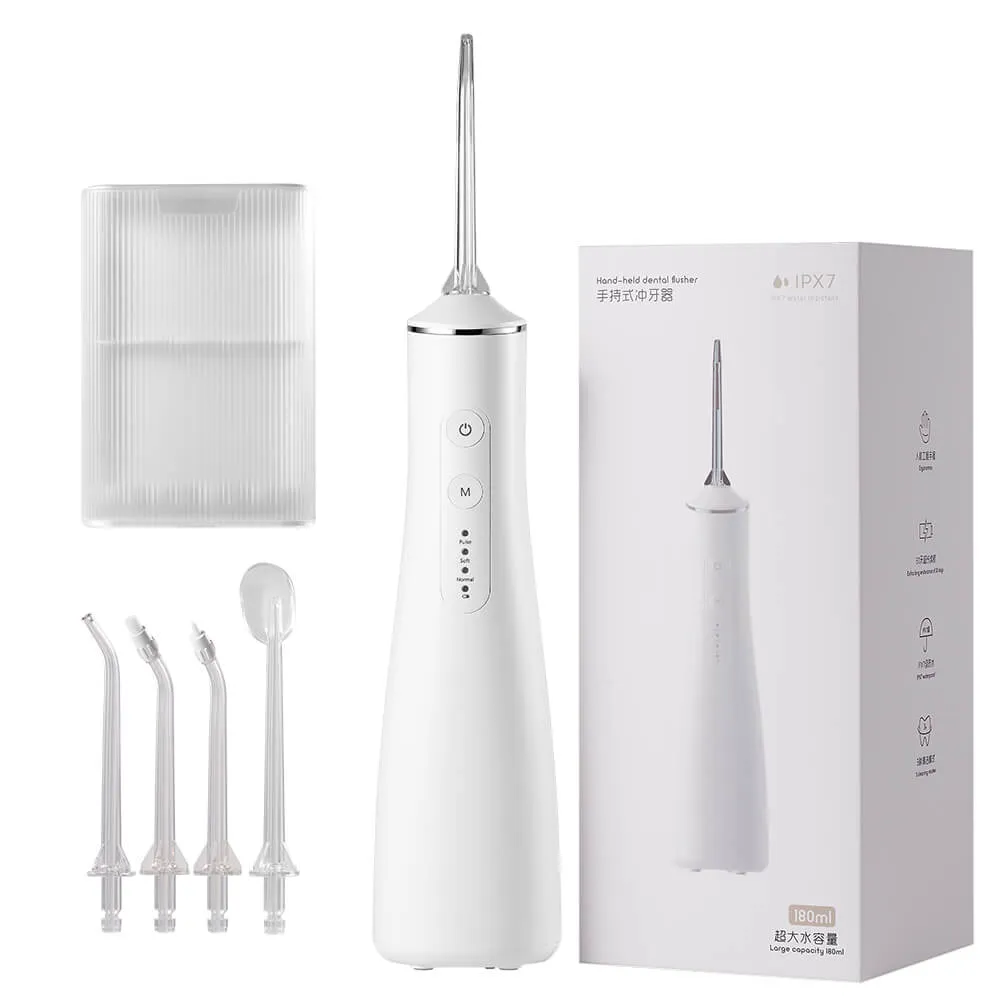
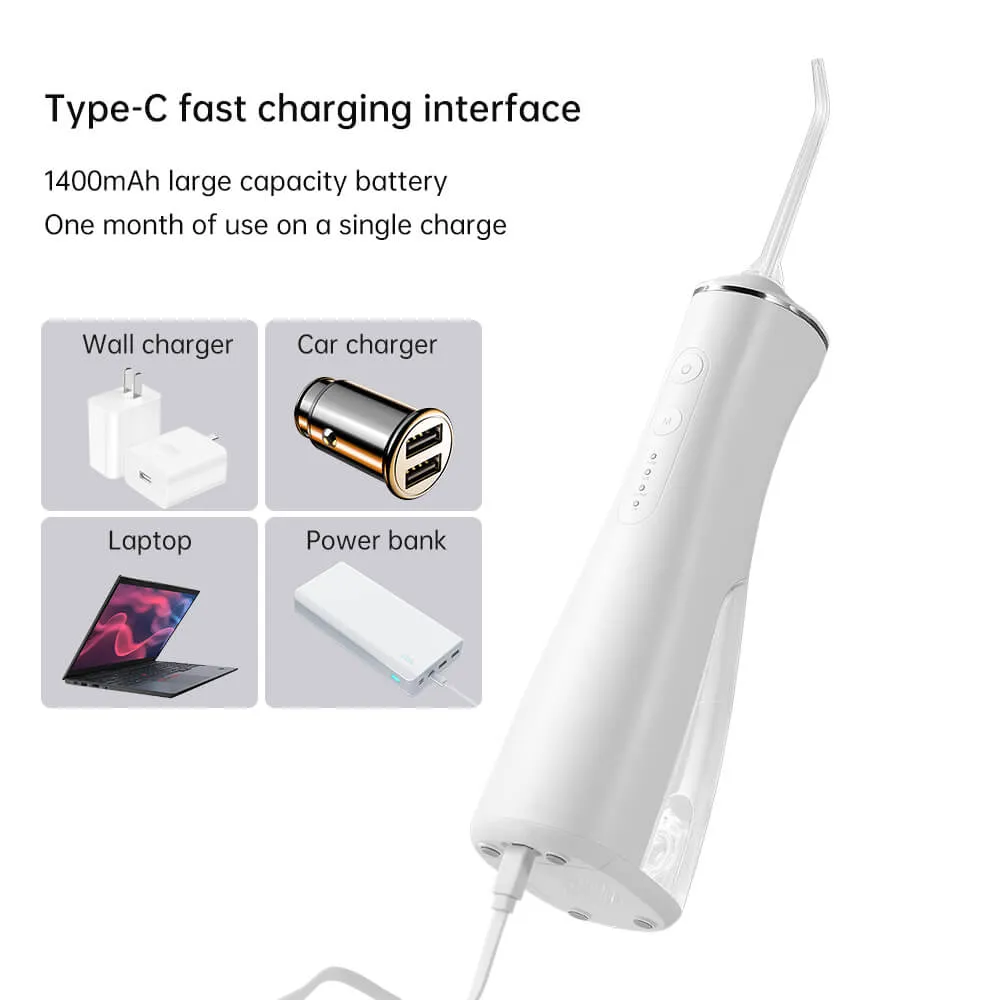
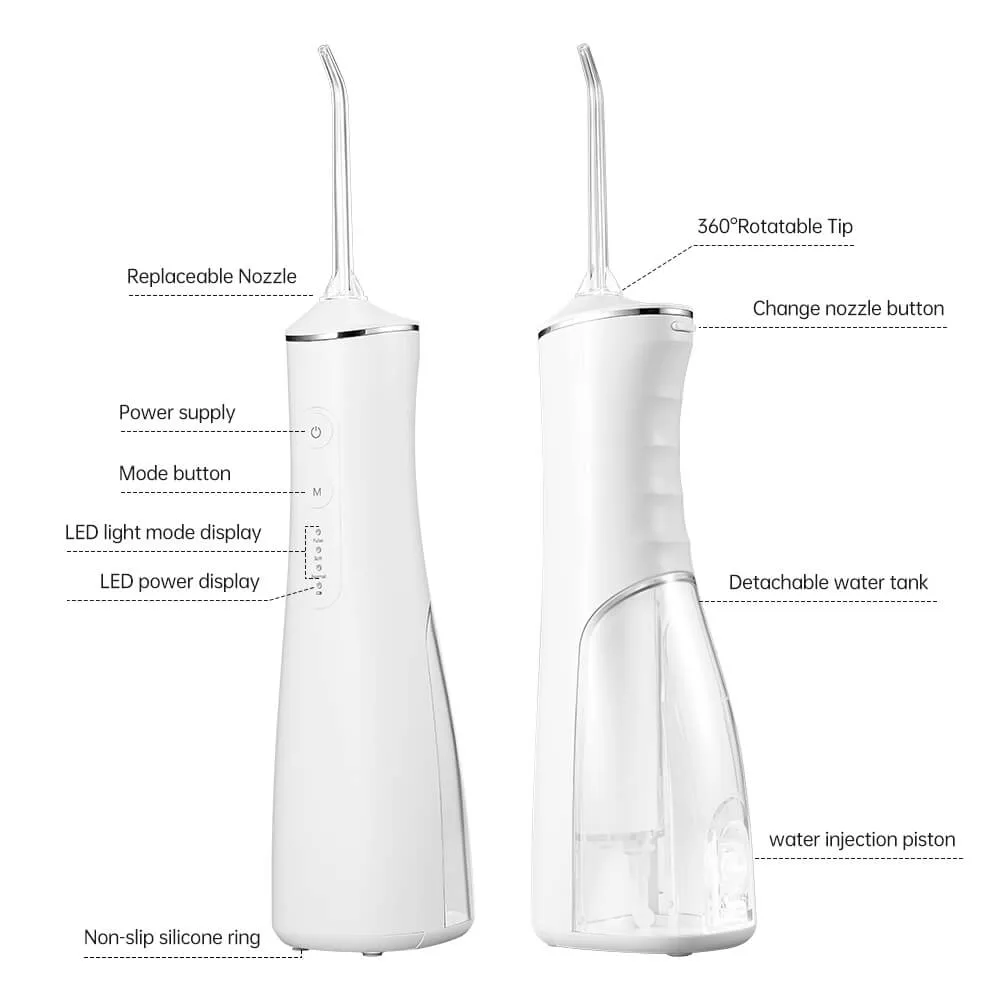
Charge the Device: Ensure that your flosser is fully charged. Most rechargeable water flossers have an indicator light to show when they are fully charged. A full charge typically lasts for several uses, depending on the model.
Fill the Reservoir with Water: Open the water tank and fill it with lukewarm water. Some users prefer to add a small amount of mouthwash or salt to the water for extra freshness, but pure water is typically the most effective.
Choose the Right Tip: Most water flossers come with multiple tips for different needs. If you’re new to water flossing, start with the standard tip. If you have braces or sensitive gums, you may want to use a specialized tip designed for your needs.
2. Adjust the Pressure Settings
Rechargeable water flossers come with adjustable pressure settings that allow you to tailor the intensity of the water stream. Start with a lower setting to get comfortable, then gradually increase the pressure if you feel the need. The right pressure helps remove plaque without irritating your gums.
3. Position the Water Flosser
Once your device is ready, position yourself comfortably over the sink. You may want to lean slightly forward to avoid water splashing everywhere. Place the tip of the water flosser in your mouth, ensuring the stream is directed toward your gum line.
4. Start Water Flossing
Now, it’s time to start flossing:
Turn the Device On: Press the power button to activate the water flosser.
Follow the Gum Line: Slowly move the flosser tip along your gum line, pausing between teeth. The water pressure will help dislodge food particles and plaque that traditional flossing may miss.
Work in Sections: Divide your mouth into quadrants (upper right, upper left, lower right, lower left) to make sure you thoroughly clean every area. Spend 30 seconds to 1 minute on each section, ensuring you reach both the front and back teeth.
Use a Gentle Motion: Do not force the flosser into your gums. Let the water do the work by gently moving the nozzle along your gum line.
5. Clean Hard-to-Reach Areas
For areas that are harder to reach, such as the back molars or the spaces around dental work (braces, implants, crowns), adjust the water flosser’s tip angle. You can use a specialized orthodontic tip to target these hard-to-reach spots. Pay extra attention to areas where food particles tend to accumulate.
6. Rinse and Dry
After completing your water flossing session, turn off the device and rinse your mouth with water or mouthwash for a fresh, clean feeling. Empty the water tank and dry the device thoroughly. Regular cleaning of your water flosser is crucial to keep it in optimal working condition and prevent bacterial buildup.
7. Clean the Water Flosser Regularly
To maintain your rechargeable water flosser, it’s important to clean it regularly. Follow these steps:
Disassemble the Parts: Detach the tip and water reservoir after each use.
Rinse the Parts: Clean the tank and the tip under warm running water.
Dry the Device: Wipe the external parts with a clean towel or cloth and allow the parts to air dry.
Some models may also have a self-cleaning feature that helps remove any internal residue, making maintenance even easier.
Benefits of Using a Rechargeable Water Flosser
Water flossing offers a number of advantages over traditional flossing:
Effective Plaque Removal: The water pressure reaches between teeth and below the gum line, helping remove food particles and plaque that brushing alone might miss.
Gentler on Gums: For those with sensitive gums, water flossing is less abrasive than traditional flossing, reducing the risk of gum irritation and bleeding.
Great for Braces and Dental Work: Water flossers are ideal for people with braces, implants, crowns, or bridges, as the water stream easily reaches difficult areas.
Saves Time: Water flossing typically takes less time than traditional flossing, making it easier to incorporate into your daily routine.
Easy to Use: It’s an easy-to-use, convenient alternative for people who find traditional flossing difficult.
Conclusion
Using a rechargeable water flosser is a simple yet effective way to improve your oral health. By following the step-by-step guide outlined above, you can ensure that you’re getting the most out of your device. Whether you're looking for better plaque removal, enhanced gum health, or easier cleaning for dental work, a water flosser can become an essential part of your daily routine. For the best results, make sure to clean your water flosser regularly and use it consistently. Over time, you'll notice a cleaner, healthier mouth and a significant reduction in plaque buildup.